

AlphaPrime User Guide
This guide follows the order of one research session: install, prepare data, set up, generate, read the results, and export.
The screenshots come from the trial version and show the Traditional Chinese interface; the layout is the same in every language. The full version has more indicator families and features, so some screens will look richer.
1Install
- System requirements:
- Windows 10/11, 64-bit.
- The CPU edition runs on any graphics card.
- The GPU edition needs an NVIDIA GeForce GTX 10 series or newer.
- Sign in to the member center on the website, download the installer and run it.
- If Windows shows a blue warning during setup, follow the install walkthrough on the website and continue.
2Activate your license
- The first time you open AlphaPrime you will see the Welcome to AlphaPrime screen.
- If you do not have a license code yet, click the link to request a free trial code from the AlphaPrime member center.
- Paste the trial code or license code into the License code field and click Activate.
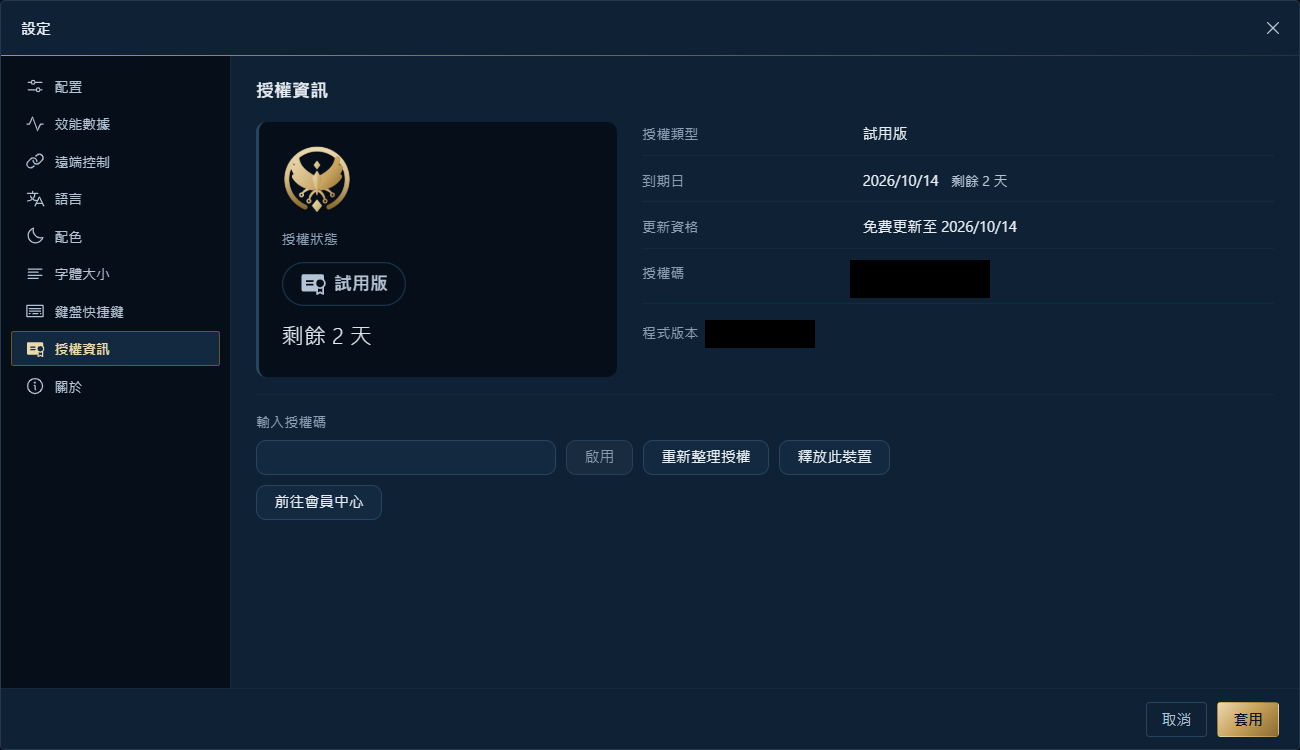
To change the code or check its status later, open Settings › License at the bottom of the left sidebar.
3Get to know the screen
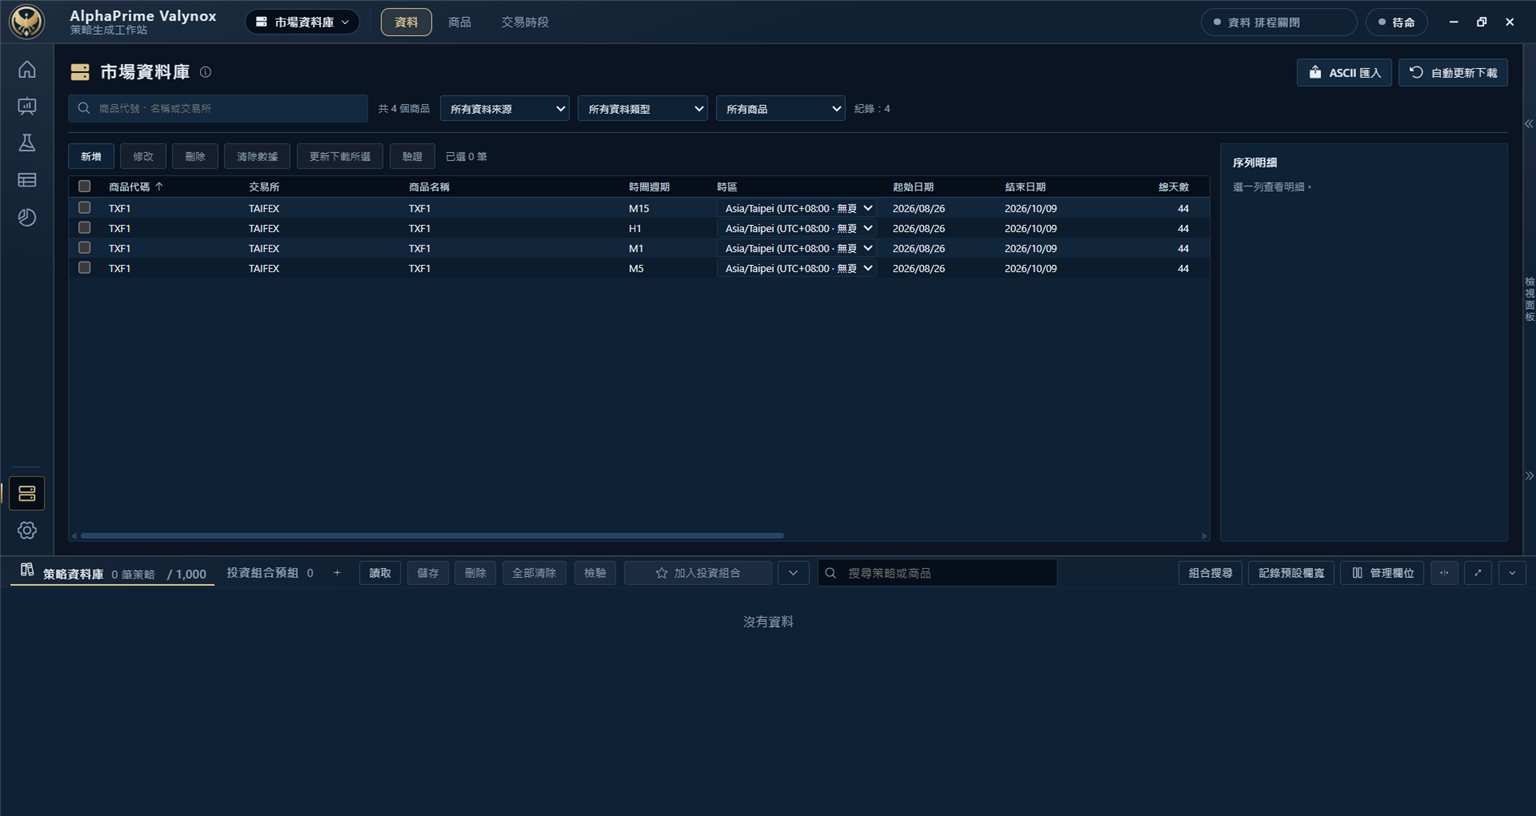
At the top of the left sidebar: Home, Monitor, Generation settings, Performance report and Portfolio Power. At the bottom: Market data and Settings.
Generation settings has six tabs across the top: Market & backtest → Strategy rules → Building blocks → Generation mode → Filter & keep → Strategy validation.
4Prepare data (example: TAIEX futures)
Historical market data is updated in Market data, for research and backtesting inside the software.
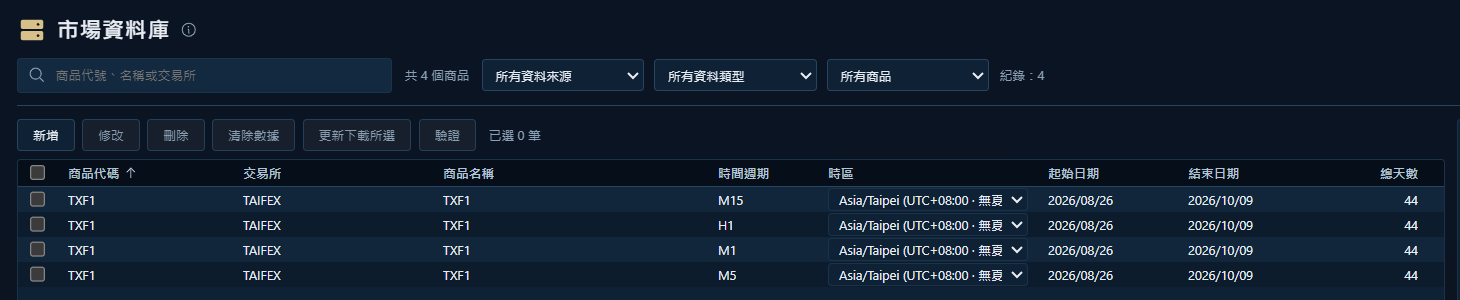
- Click Market data in the left sidebar, then Auto-update download at the top right. Historical data is brought up to date inside the software.

- You can also choose yourself: click Add, tick the instruments and timeframes you want, and click Download selected.
- To bring data up to date later, tick those rows and click Update selected.
- To check for gaps or duplicates, tick the rows and click Verify.
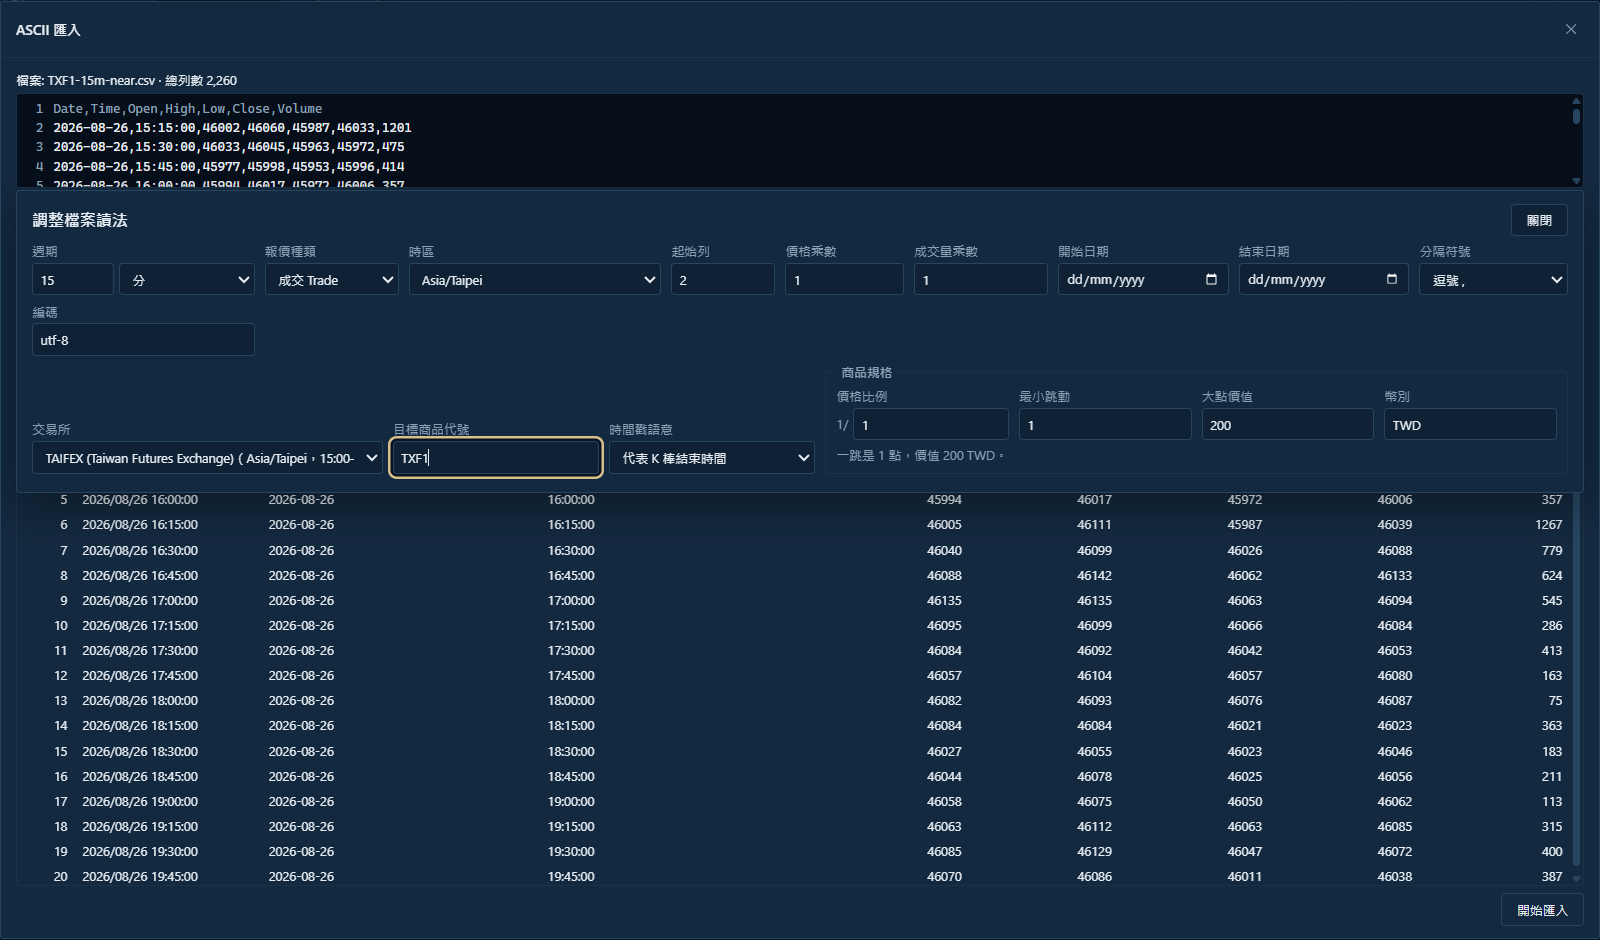
If you have your own data, click ASCII import at the top right of Market data and pick your file. The import panel opens (click Adjust to change how the file is read). Under What is this instrument? choose the instrument (TAIEX futures appears as TXF · TAIFEX). Under Adjust, set Time zone to the zone the data really belongs to, for example Asia/Taipei for TAIEX futures. Click Start import; the file is checked automatically first.
5Choose data, set costs, split out-of-sample
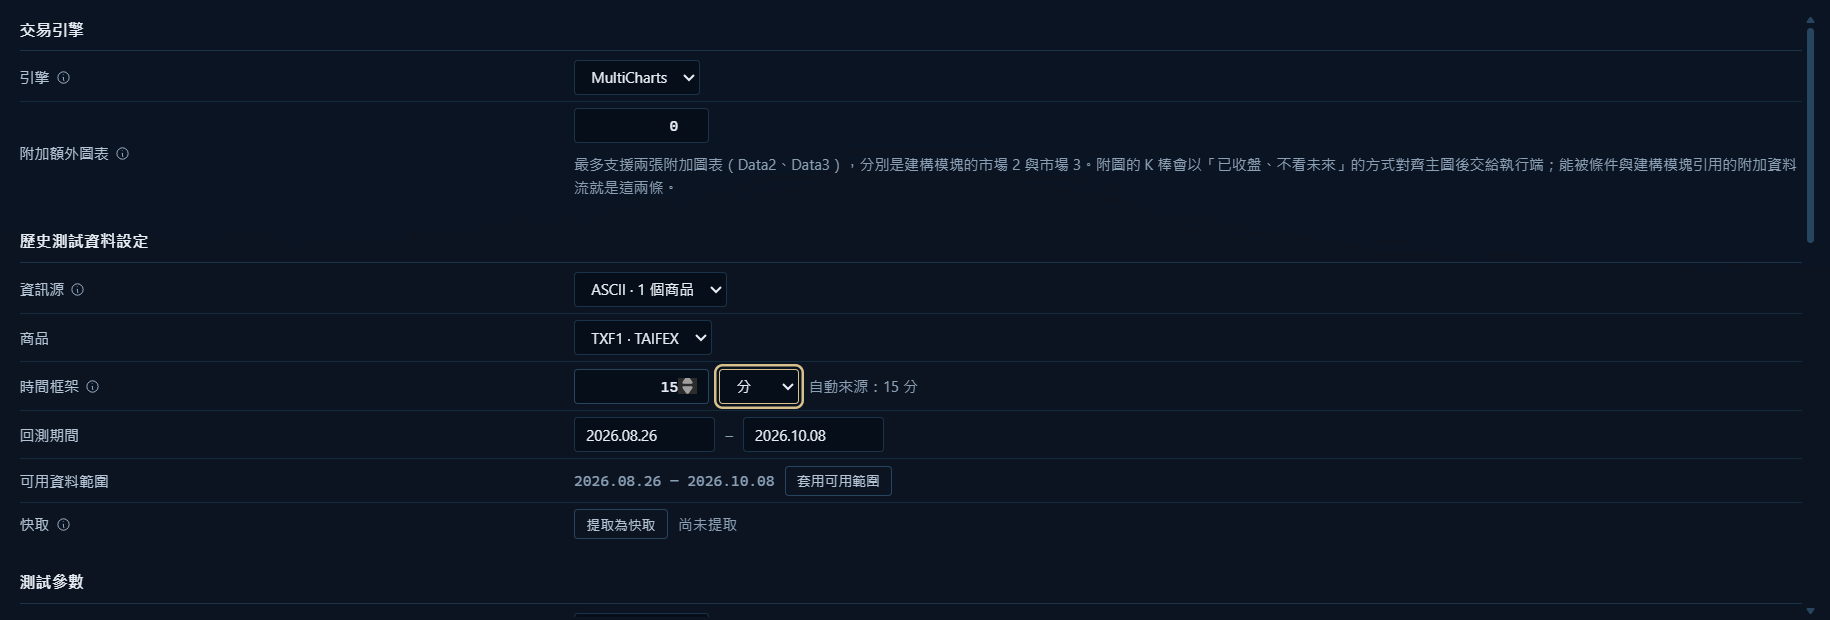
Go to Generation settings › Market & backtest:
- Historical data settings: choose the data source, the instrument (TAIEX futures here) and the timeframe, for example 15 minutes.
- Backtest period: enter a start and end date, or click Apply available range to use all the data.
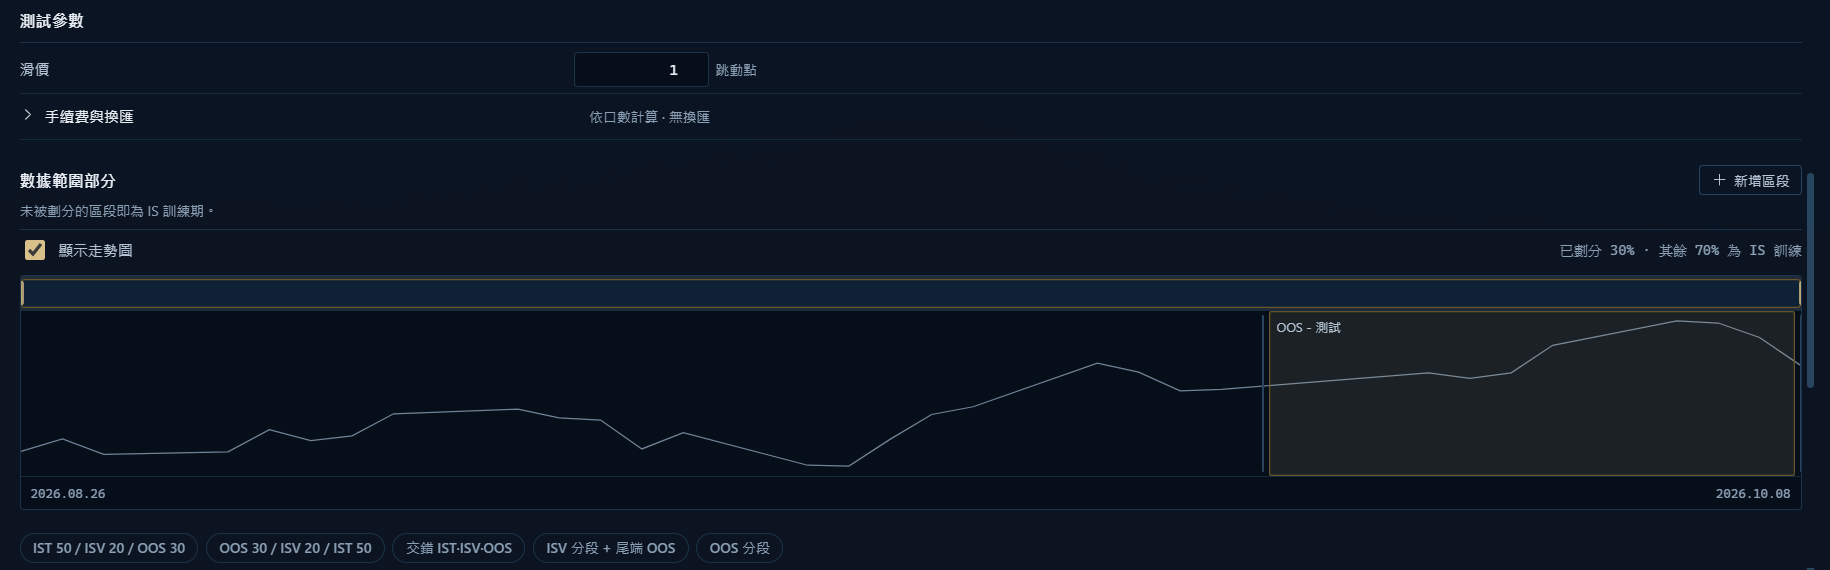
- Test parameters:
- Slippage: ticks per side, per contract.
- Expand Commission and currency and set the commission type and amount.
- Data ranges: a few preset buttons sit below, for example IST 50 / ISV 20 / OOS 30.
- IST: the data used to find strategies
- ISV: for validation
- OOS (out-of-sample): kept back for the final check
The factory setting already reserves the last 30% as OOS; whatever is not split off is the in-sample training period.
6Set direction, stop-loss and take-profit
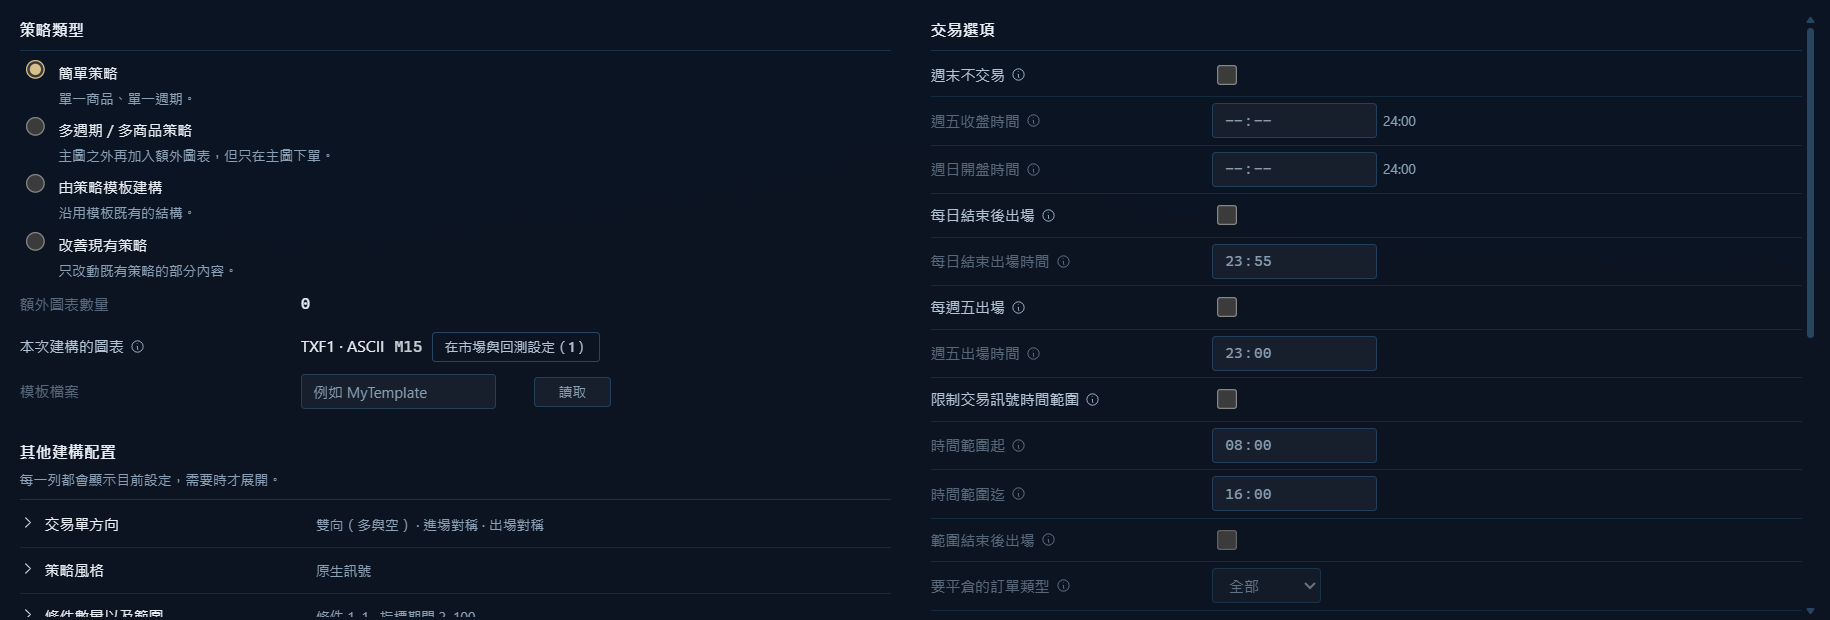
Go to Generation settings › Strategy rules:
- Strategy type: choose Simple strategy.
- Other build settings: click to expand. Trade direction sets long, short or both, and the stop-loss and take-profit ranges are here too.
- On the right are the trading options, for example No weekend trading and Exit at end of day.
7Pick indicator conditions
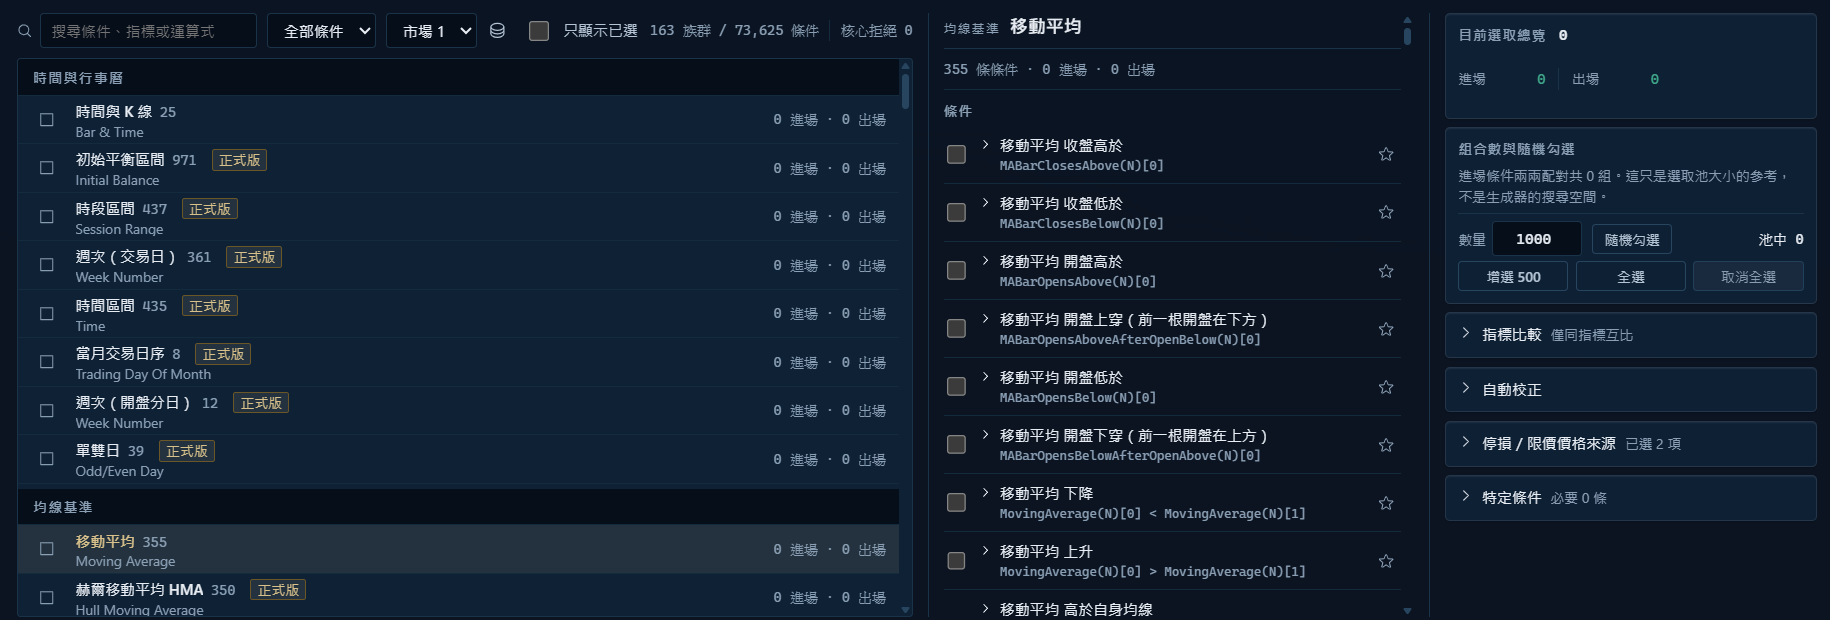
Go to Generation settings › Building blocks:
- The list on the left holds the indicator families. Tick two or three you know well.
- Leave the parameter ranges at the factory values for now.
The trial version can use 15 of the indicator families; families marked Full version are not included in the trial.
8Choose how to generate and what to keep
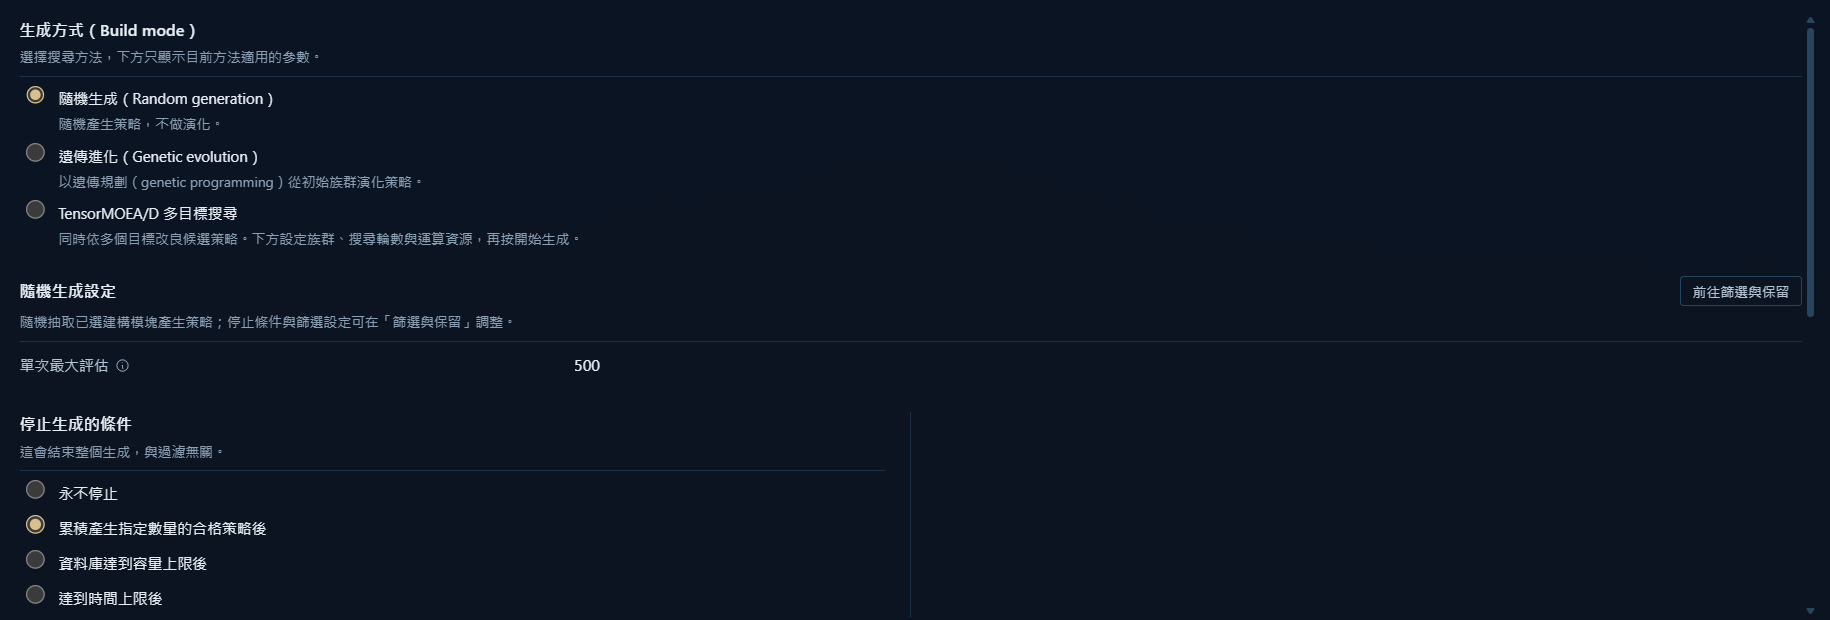
- Generation mode: choose Random generation and keep the factory parameters. Lower on the same page, the stop conditions decide when a run stops by itself.
- Filter & keep: decide which strategies may stay and how they are ranked.
- Strategy validation: which checks the kept strategies must pass, and where walk-forward analysis is set. For the idea behind it, see Walk-forward analysis: why one backtest is not enough.
9Start generating
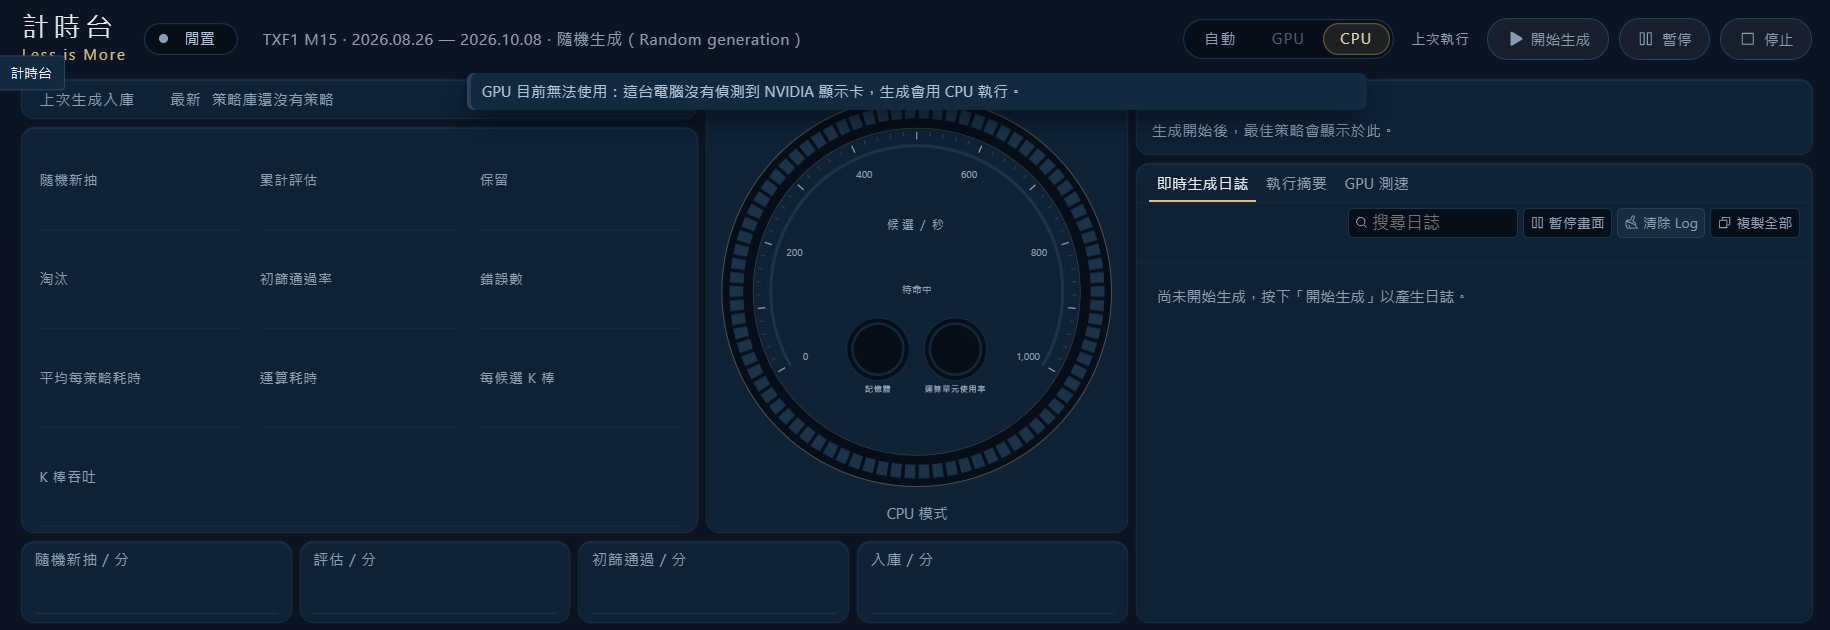
- Click Monitor in the left sidebar.
- At the top right choose Auto, GPU or CPU. Without an NVIDIA graphics card, choose CPU or Auto.
- Click Start generation. While it runs you can Pause or Stop; after a pause click Resume.
- Best strategies this run lists the current top strategies. Every strategy that is kept goes to the strategy database at the bottom.
10Read the results
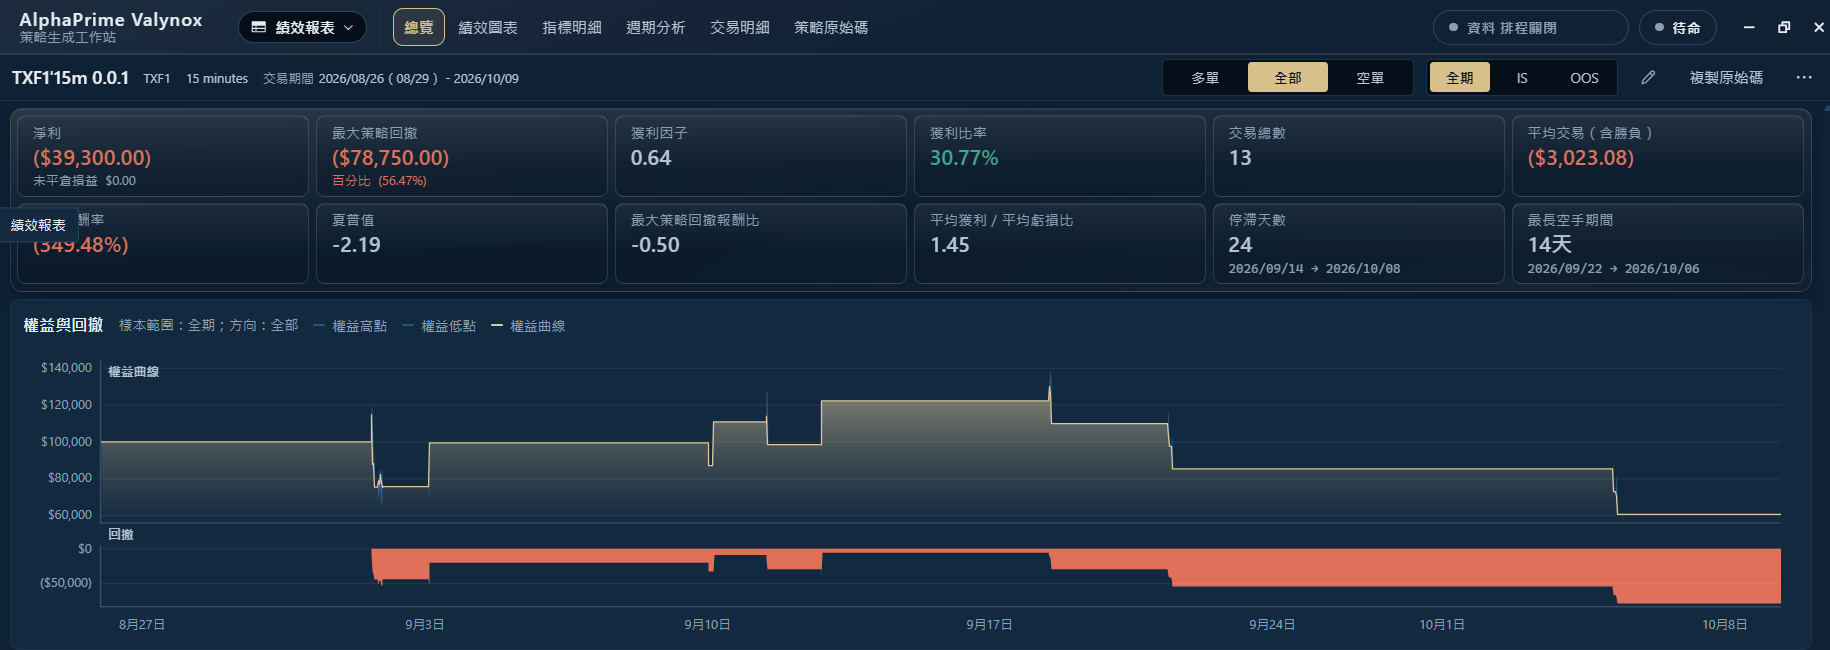
- Double-click a strategy in the strategy database at the bottom. It opens in Performance report.
- Look at these three places first:
- Performance charts: switch the sample to OOS and see whether the out-of-sample stretch holds up.
- Trade list: whether each entry, exit and cost looks reasonable.
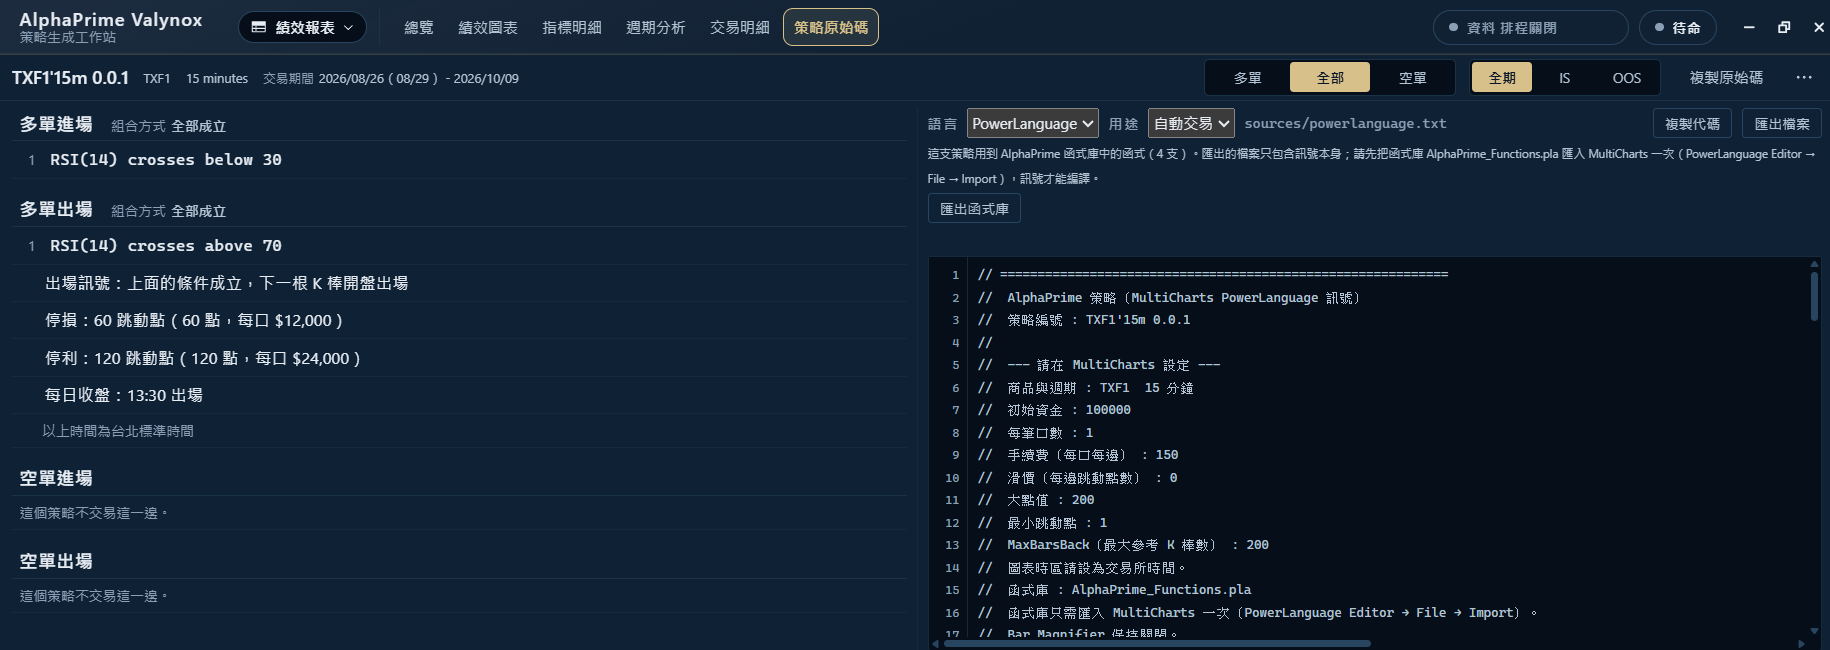
- The left column of the Strategy source code tab: which conditions and parameters the strategy actually uses.
11Export to major trading platforms
AlphaPrime exports to major trading platforms; see export to your platform for what is supported.
- In Performance report, open the Strategy source code tab. The right column is the strategy's source code.
- Click Export file to save it as a file, or Copy code.
- Before your first export, click Export library and import it once in your platform's code editor. If you are asked whether to overwrite functions with the same name, answer yes. Strategies exported afterwards will not compile without it.
- Import the strategy into your platform and compile it.
- Follow the setup lines at the top of the source code to set the chart's time zone, commission, slippage and so on.
- Before going live, compare the platform's trade list with AlphaPrime's on the same data. See From generated strategy to your platform: a comparison checklist.
The trial version can also view and export source code.
12Need help?
- Field help: hover over the ⓘ icon next to a field.
- Support: https://alphaprime.trading/en/support/
- If you get stuck anywhere, write to info@alphaprime.trading and we will walk you through it step by step.
AlphaPrime is a software tool for strategy research. It is not investment advice and does not guarantee profit; backtest results do not represent future performance.